
Most people think the secret to a professional paint job is the quality of the paint or the brand of the brush. While those matter, 80% of a professional finish is determined before the lid of the paint can is even opened.
If you skip surface preparation, even the most expensive premium paint will eventually peel, bubble, or reveal every tiny imperfection beneath it. Follow this step-by-step guide to ensure your walls look gallery-ready.
1. Clear the Canvas: Cleaning and Clearing
Paint will not adhere to dust, grease, or cobwebs. If you paint over dirt, you are essentially painting a layer that will eventually slide off the wall.
- Remove Hardware: Take off all switch plates, outlet covers, and curtain rods. Store the screws in a labeled plastic bag.
- Dust Thoroughly: Use a microfiber cloth or a vacuum attachment to remove dust from the ceiling corners, baseboards, and walls.
- The De-Greasing Wash: In kitchens or high-traffic areas, wash the walls with a mixture of warm water and a mild detergent or TSP (trisodium phosphate) to remove oils and fingerprints.
2. Heal the Scars: Patching and Repair
Light reflecting off a glossy paint surface acts like a spotlight for dents and cracks.
- Fill the Gaps: Use a high-quality lightweight spackle for nail holes and small dents. For larger cracks, use a joint compound.
- Overfill Slightly: Spackle tends to shrink as it dries. Apply a small “mound” over the hole rather than wiping it flush.
- Check for peeling: Scrape away any old, loose, or flaking paint with a putty knife. If you don’t remove the loose bits now, they will create “craters” in your new finish.
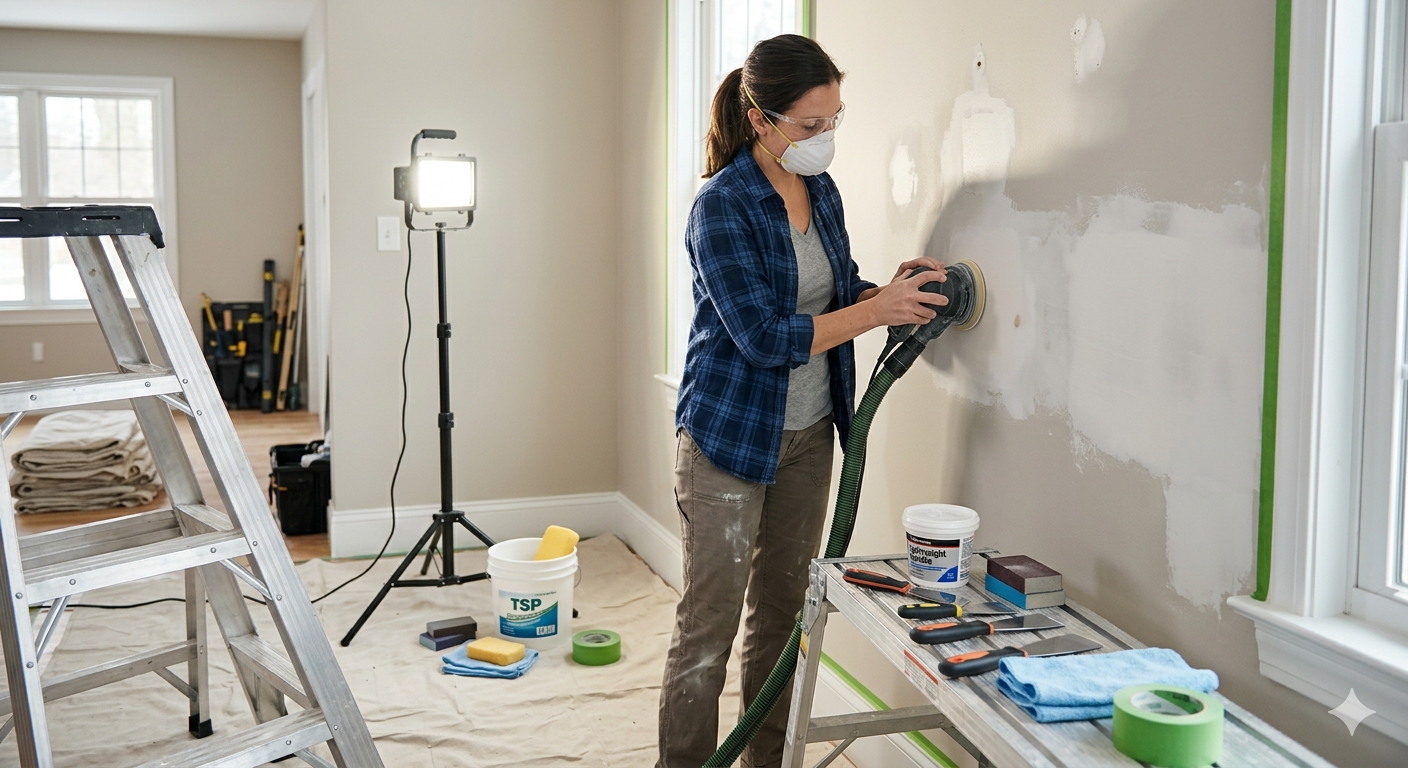
3. The Smoothing Phase: Precision Sanding
Sanding is the bridge between a “DIY look” and a “pro finish.” It levels out your patches and creates “tooth” for the new paint to grip.
- Wall Sanding: Use a fine-grit sandpaper (120 to 150 grit) to lightly sand the entire wall surface.
- Patch Sanding: Once your spackle is dry, sand it until it is perfectly flush with the wall. Run your hand over it; if you can feel a ridge, you will see a ridge.
- The Final Wipe: Crucial Step. After sanding, the room will be covered in fine dust. Wipe everything down again with a damp cloth or a tack cloth.
4. Define the Borders: Professional Masking
Crisp lines are the hallmark of a master painter.
- Quality Tape: Use a dedicated painter’s tape (like blue or green tape).
- The Seal Technique: Once the tape is applied to the baseboards or ceiling, run a clean, damp cloth or a flexible putty knife over the edge to firmly “lock” the seal. This prevents paint from bleeding underneath.
- Tape Removal: Remove the tape while the paint is still slightly tacky, or wait until it is completely dry and score the edge with a razor blade to avoid pulling up the paint film.
5. The Secret Weapon: Strategic Priming
Priming isn’t just “thin paint.” It is a chemical sealer that creates a uniform surface.
- Block Stains: Use a primer to cover water spots, ink, or crayon marks so they don’t bleed through your topcoat.
- Ensure Uniformity: If you patched holes, the spackle will absorb paint differently than the rest of the wall (a phenomenon called “flashing”). A coat of primer ensures the sheen looks the same across the entire surface.
- Drastic Color Changes: If you are going from a dark navy to a light cream, a tinted primer will save you from having to apply four or five coats of expensive finish paint.
The Pro Checklist
Before you start painting, ensure you have:
- [1] Drop cloths (canvas is better than plastic for absorbing drips).
- [2] A sturdy ladder.
- [3] High-quality angled sash brushes are ideal for “cutting in.”
- [4] A bright work light (to spot shadows and imperfections).
Pro Tip: “Work from the top down.” Always prep and paint the ceiling first, then the walls, and finally the trim and baseboards. This ensures any accidental drips are covered as you move downward.