

Aging in place is a powerful concept. It means having the health, comfort, and safety to live independently in your own home for as long as possible. Many homeowners delay necessary modifications until an emergency occurs.
By proactively adapting your living space, you prevent accidents and guarantee your future freedom.
You don’t need to be an architect to “future-proof” your home. With basic tools, planning, and this essential guide, you can tackle the key DIY upgrades that make the biggest difference.
Strategic Entry: Lighting and Thresholds
The safest home starts before you even walk through the door. Ensuring clear paths and visibility is the first priority.
- Brighten Up (Exterior): Add motion-sensor floodlights near the front door, driveway, and walkways. Good visibility is the best defense against trips and falls at night.
- Zero Thresholds: If your exterior doors have a raised lip (threshold), these become significant trip hazards over time. You can replace them with lower-profile, ADA-compliant thresholds.
- Lever-Style Handles: Replace conventional doorknobs with lever handles throughout the house. They are much easier to operate if you have limited grip strength or arthritis.
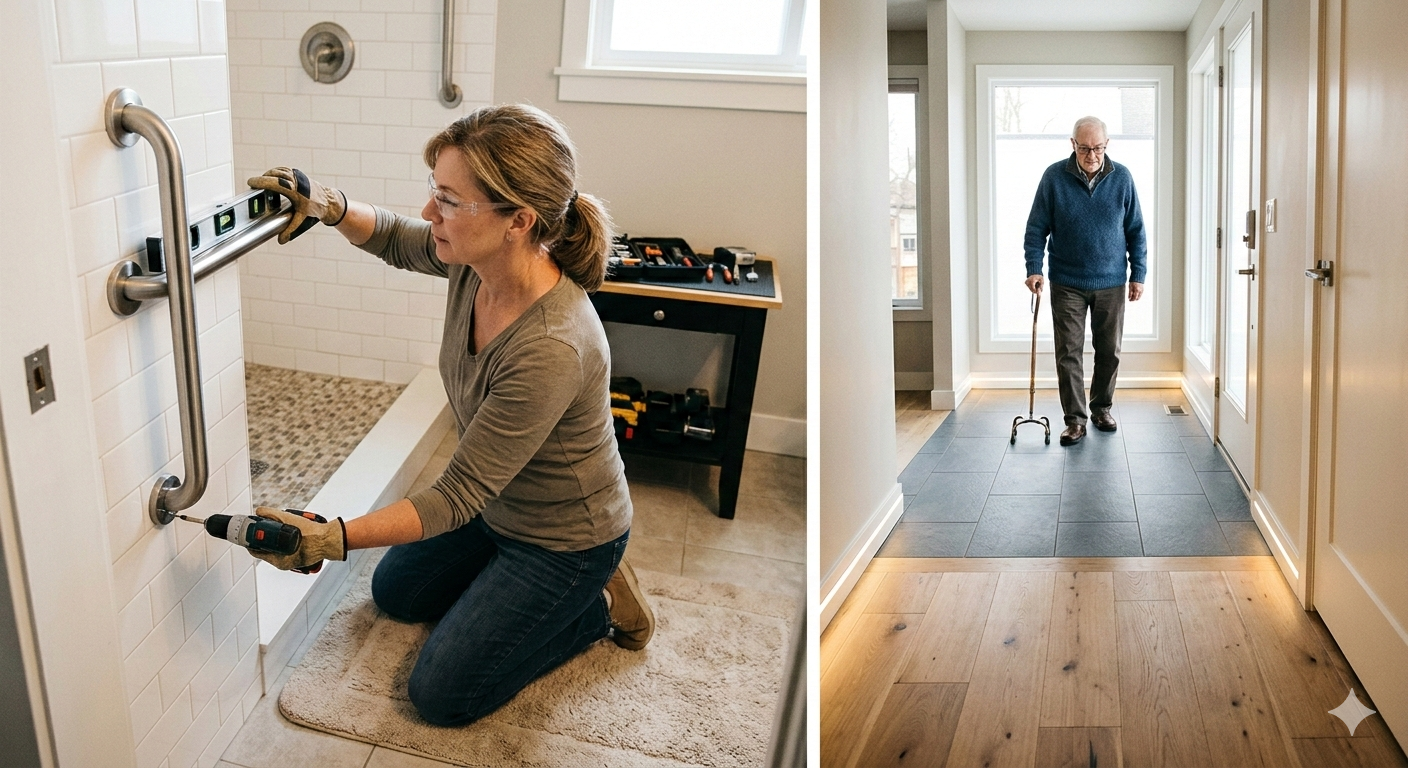
Bathroom Safety: The Grab Bar Revolution
The bathroom is statistically the most dangerous room in the house for falls due to slippery surfaces and tight spaces. This is the single most important DIY upgrade you can perform.
Crucial Warning: Grab bars MUST be installed directly into the wall studs or with specialized high-load toggle bolts designed specifically for this purpose (like WingIts). Suction cup grab bars are not safe for weight-bearing support.
Where to Install Grab Bars:
- Near the Toilet: Install one horizontal grab bar parallel to the floor, 33-36 inches high, slightly forward of the toilet.
- Inside the Shower/Tub:
- Vertical Entry Bar: A short, vertical grab bar near the entry of the tub or shower helps with stability when stepping over the threshold.
- Horizontal Sidewall Bar: Install a long horizontal bar along the main sidewall of the tub.
DIY Grab Bar Tips:
- Use a stud finder to locate the wall studs and mark them clearly.
- Ensure the bar is firmly secured with 2-3 inch stainless steel screws.
- Check that the bar is level and sturdy before use.
Non-Slip Tiling and Surface Solutions
Slippery floors are the enemy of mobility. You can transform your dangerous, polished tile into a safer surface without a costly tear-out.
- Choose Small-Format Tiles: The safest tiles are small, usually 2×2 inches or smaller, such as penny tiles or small hex tiles. They have more grout lines per square foot. Grout provides excellent natural traction for feet and canes.
- Apply Non-Slip Treatments: If you have existing tile you don’t want to replace, you can treat it with a high-quality non-slip (anti-slip) tile coating or chemical treatment. These treatments increase the microscopic profile of the tile, providing “grip” without changing its appearance.
- Bathroom and Entryway Focus: Prioritize these two areas for non-slip flooring solutions.
- A Simple Upgrade: Always place low-pile, rubber-backed non-slip mats in the shower and immediately outside the tub. Ensure they are machine washable.
Enhancing Lighting and Visibility
Vision changes as we age, so adequate light is a primary safety concern, preventing missteps and improving navigation.
- Maximize Ambient Light: Open curtains and blinds during the day. Clean windows regularly.
- Improve Task Lighting: Install bright LED lighting in areas where tasks are performed, such as under-cabinet lighting in the kitchen and bright vanity lights in the bathroom.
- Night Lighting (Crucial): Add motion-sensor nightlights along hallways, in the bathroom, and in the kitchen. This provides instant visibility during nighttime trips without forcing you to fumble for switches.
- Contrast is key: Use contrasting colors to make crucial areas easier to identify. (e.g., Use dark tape on the edge of stairs if the flooring is light-colored.)
Kitchen Comfort and Utility
A few simple modifications can make your kitchen safer and more functional.
- Lower Items: Move frequently used items to lower cabinets or countertops to avoid bending and reaching.
- Pull-Out Shelving: Consider installing pull-out shelves or “lazy Susans” in base cabinets. This eliminates the need to reach deep into dark cupboards.
- Single-Handle Faucet: If possible, replace the kitchen faucet with a single-handle pull-down model, making it much easier to operate with one hand.
- Increase Seating: Keep a sturdy, counter-height stool in the kitchen so you can sit while preparing meals or washing dishes.
By focusing on these practical, affordable, and impactful DIY upgrades, you are making a lasting investment in your health and independence. Future-proofing your home isn’t just about the physical space; it’s about providing yourself and your loved ones with peace of mind.